Walkthrough
Here is the complete walkthrough for Digimon World — enjoy reading and have fun playing!
Shortcuts to locations:
File City
You start your adventure in the village of File City.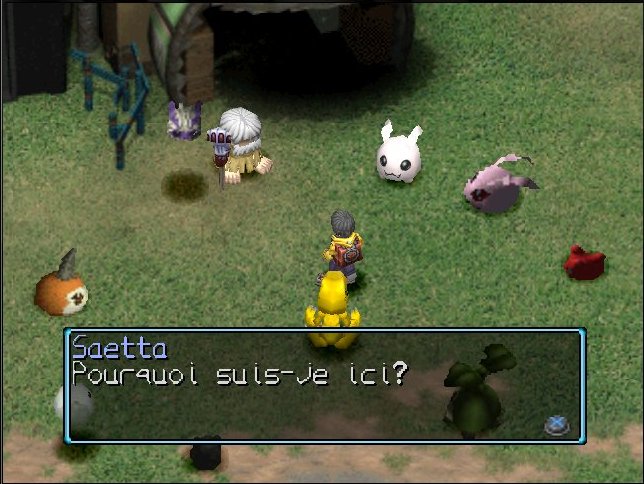 There, Jijimon will explain the whole story and you can get started. The goal of the game, at first, is to recruit as many Digimon as possible to make the passage to Infinity Mountain appear.
Enter Jijimon's house and talk to Tokomon to get a few survival items for your first day. Go outside and talk to Tanemon, above Jijimon's house, to get 3 Meats.
To the west of the village, you'll find the training area for your Digimon. You can raise their stats there to digivolve them however you like.
Recruiting
- Greymon:
When the city reaches a prosperity of 15 or more, go see Jijimon, chat with him a bit and leave his house. As soon as you step outside, Greymon will challenge you — beat him! Watch out, he's a tough opponent. He'll build a Battle Arena on the screen south of Jijimon's house. You'll be able to enter tournaments there and win some great prizes.
- Airdramon:
When the city reaches a prosperity of 50 or more, go see Jijimon, chat with him a bit and leave his house. As soon as you step outside, Airdramon will attack you and deal 1000 HP of damage to your Digimon before fighting you. Beat him and, when you return to the game after beating the final boss, he'll open a fortune-telling stand in the Arena.
Native Forest
This is the first area of the game you'll be able to explore. You'll find the Digimon that will form the backbone of your city here. The enemies aren't too tough for a Digimon game.
Recruiting
- Agumon
The first time you enter the Native Forest, Agumon will attack you.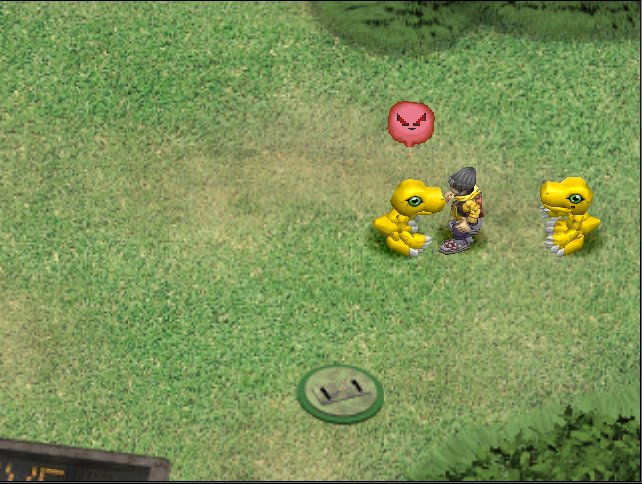 Beat him and he'll join the city.
He'll take care of the Item Bank next to Jijimon's house. You can store any items you don't currently need there.
- Kunemon
When you reach the screen with the restroom in the center, take the eastern path to reach the area known as "Kunemon's Bed." Talk to him, give him some food, and you'll be able to fight him.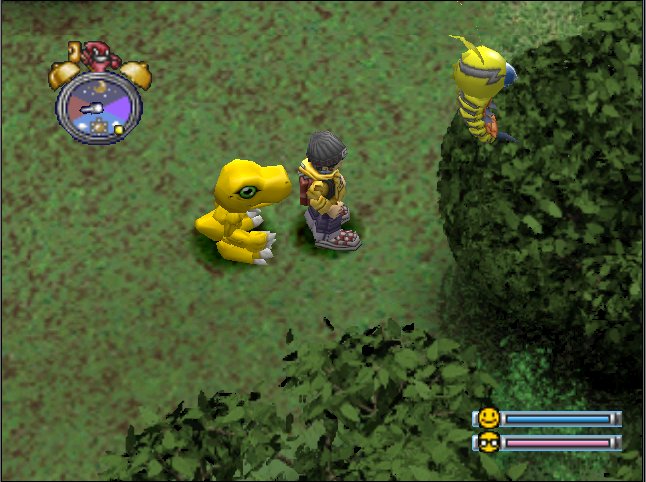 Once you've beaten him, he'll join the city. You'll find him on the screen south of Jijimon's house. Behind him, there's a shortcut leading to the Digi Bridge — very handy, as you'll see.
- Palmon
Take the southern path on the screen with the restroom to reach a new screen where you'll find Palmon near some pink flowers.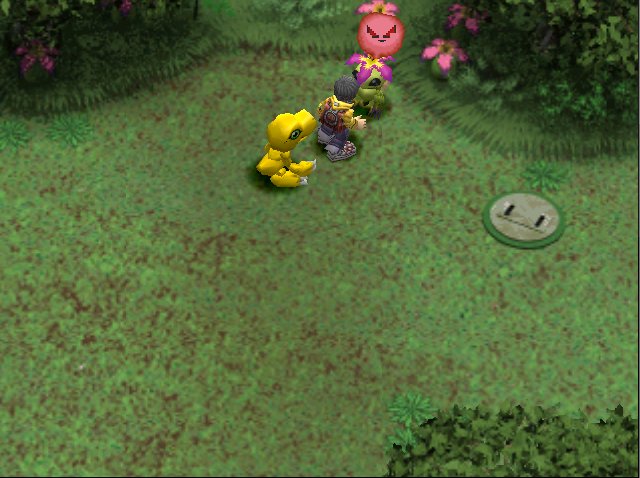 Talk to him 4 times to fight him. Once beaten, he'll join the city. He'll take care of the farm above Jijimon's house and you'll be able to collect 3 MegaMeats per day. You can also buy more from him for 500 Bits each.
- Coelamon
Go back to the "Kunemon's Bed" and take the southeastern path. Continue until you reach the beach. In the middle of the afternoon (in the orange section on the compass), head east along the beach to spot a shadow in the water.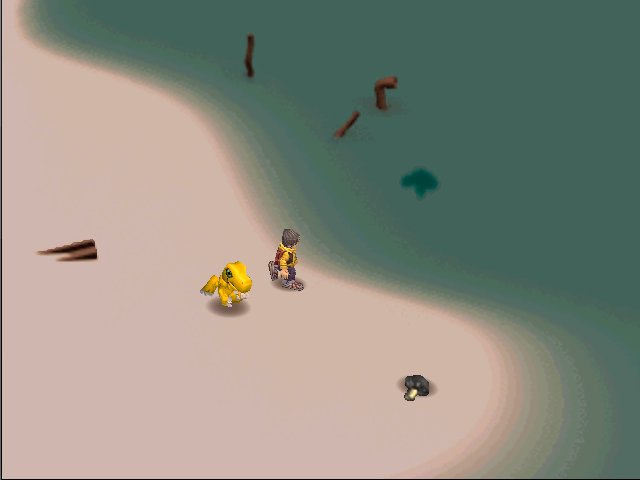 After a bit of dialogue, Coelamon will let you cross the sea by riding on his head, letting you reach the Tropical Jungle area. Once on the jungle beach, take the western path to reach the Digi Bridge that will bring you back north of the "Kunemon's Bed"
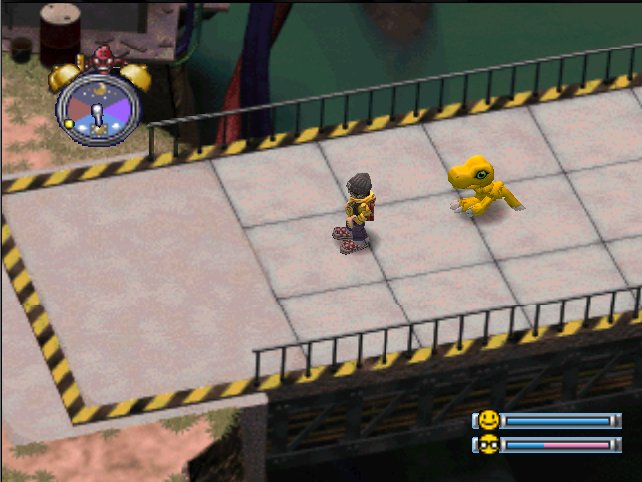 — you'll then need to go back to the first beach to talk to Coelamon again so he joins the city. He'll run the Stall on the screen south of Jijimon's house. See Shop Guide.
- Ninjamon
Once the Antique Shop has been built in your city, head over near the Digi Bridge north of the "Kunemon's Bed." There, Ninjamon will appear and challenge you to a duel. Beat him and he'll join the Antique Shop team. He'll give you valuable tips about the rarest items in the game.
- Etemon
South of the "Kunemon's Bed," you'll find a tree with a sort of door in its center. When your city's prosperity has passed 50, come back to this tree and press X when you're right next to the door. Etemon will attack without warning and your Digimon will lose between 500 and 1500 HP before the fight begins. Etemon is an Ultimate Digimon, which means the battle won't be a walk in the park. Once beaten, he joins the city. You'll find him next to the Digi-Bridge, where he'll sell you the Banananor item for 50,000 Bits.
Tropical Jungle
The easiest way to continue your adventure is to head into the Tropical Jungle. You'll find quite a few Digimon to recruit there, along with some solid enemies that drop a decent amount of Bits.
Recruiting
- Betamon
Go back to the beach where Coelamon dropped you off and head east. Cross the small bridge 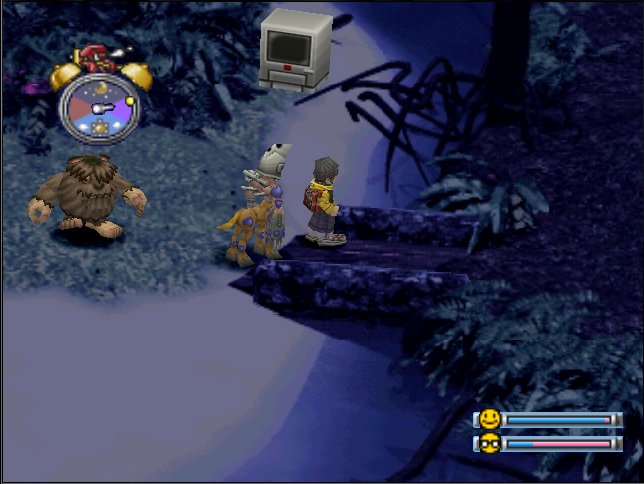 you'll find there to reach a dirt area. Head north to enter the area called "the Mangrove." Continue north to reach Betamon. Talk to him and he'll join the city. Betamon will run the Stall alongside Coelamon.
You can now buy items there (see Shop Guide)
- Vegiemon
When your city's prosperity reaches 20, go talk to Tanemon (across from the meat farm). He'll tell you about a plant in the Tropical Jungle and the Rain Plant. On the 15th of each month, you'll see a Rain Seed appear in the pot next to Tanemon. Pick it up and head to the beach where Coelamon dropped you off earlier in the game. Take the northern path to reach a new screen. Now head east to move to the next screen. Go a little north to find a small recess in the vegetation. Examine the sprout there and use the Rain Seed on it. After a few seconds Vegiemon will appear and join you. He'll take care of the meat farm — you'll be able to collect 3 GigaMeats per day. You can also buy Super Carrots and DigiRadishes from him for 500 Bits. (see Shop Guide)
- Centarumon
Go back to the beach where Coelamon dropped you off and head east. Cross the bridge and continue east to the next screen. Now head north to reach "Amida Forest." After a bit of dialogue, head north while dodging sniper shots by ducking into the alcoves along the way. Each shot will drain 50% of your Digimon's HP. Use some healing items to keep him in shape. Be careful — when your Digimon runs out of HP, you'll be sent back to the start of the area! You'll need to heal your Digimon before you can come back. At the end, you'll find two signs: one with an "X" and one with an "O."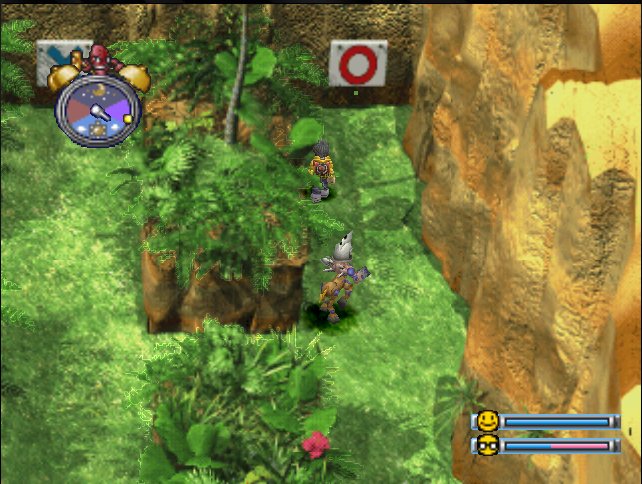 Touch the one with the "O" to make Centarumon appear. Talk to him and he'll join the city.
Centarumon will run the Clinic in the city. It's located below the Stall.
You'll be able to rest your Digimon there when he's tired, and purchase the following services and items:
see Shop Guide.
- Piximon
You'll find him in the grass along the beach where Coelamon drops you off. He comes back every day at the same time, which varies by console. The easiest way is to walk back and forth between screens until he appears. Warning: despite his small size, Piximon is an Ultimate Digimon and is far from easy to beat!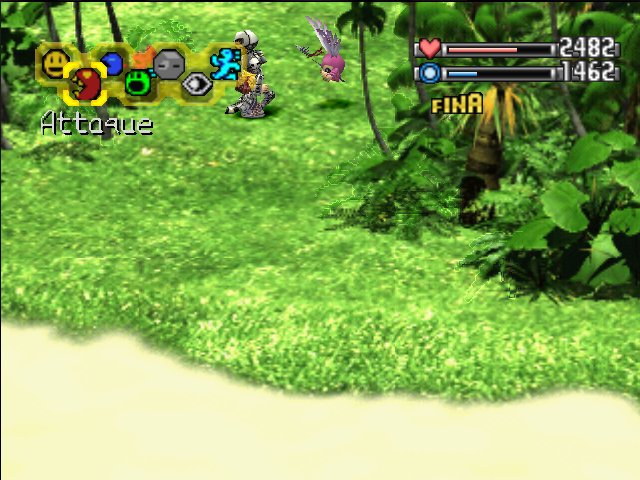 Once defeated, he'll join the city.
You'll find him in the Item Shop and he'll sell you a Training Manual for 50,000 Bits.
Ancient Dino Region
Right after recruiting Centarumon, you'll find yourself launched into the Ancient Dino Region. This area has plenty of DigiMushrooms that will earn you a decent amount of Bits.
Recruiting
- Tyrannomon
When you enter the Ancient Dino Region, head a little west and Tyrannomon will attack you.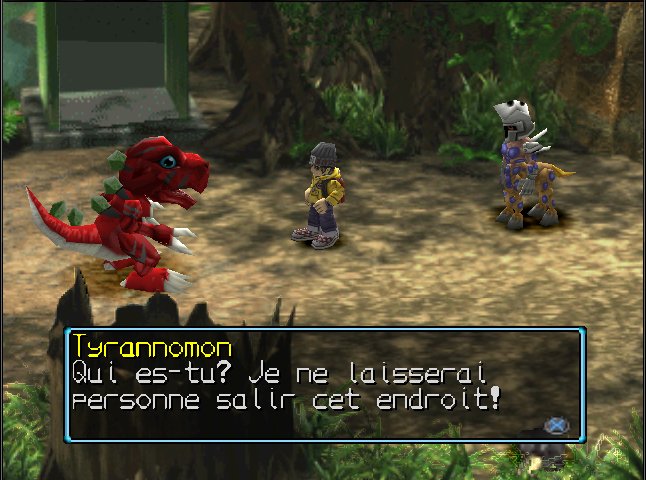 Once beaten, he'll explain where you are before leaving. Continue east and head north through the next 3 screens to find Tyrannomon again. He'll ask you to investigate a meteor that fell in the Speedy Time Zone area. The entrance to that area is right behind him.
Speedy Time Zone
This area has plenty of DigiMushrooms that will earn you a decent amount of Bits. Be careful — time passes twice as fast as normal in this area!
Recruiting
- Tyrannomon (continued)
When you're on the first screen of the area, take the northwest path. Head all the way to the north of that new screen. When you enter the screen at the very top, go back to the previous screen and head west. There, take the northern path to reach the screen with a large rock to the north.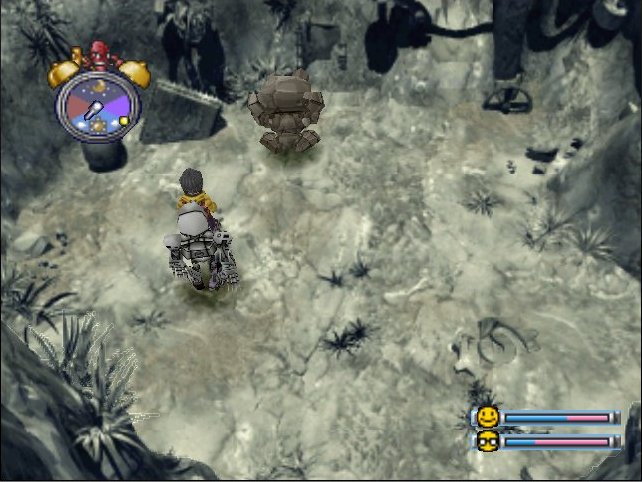 Examine it and it will transform into Meteormon, who will then attack you. Once you've beaten him, go back to see Tyrannomon and he'll join you. He'll open a restaurant across from the Stall.
He'll offer the following dishes, between 6:00 and 12:00: see Shop Guide.
Excavation
Go back to the city and head to the screen south of Jijimon's house. Take the western path, then the southwestern path on the next screen. This new screen has a digital signpost on the ground. Take the western path below the rockslide to reach the ledge leading to the Excavation. Warning: there are no restrooms in this area! Take care of your Digimon's bathroom needs before entering.
Recruiting
- Meramon
When you arrive on the first screen of the Excavation, take the southern path. You'll come out onto a screen with 3 Goburimon (the only enemies in this area). Then take the western path. You're now in the Excavation kitchen. You'll find Drimogemon there — talk to him to fight him.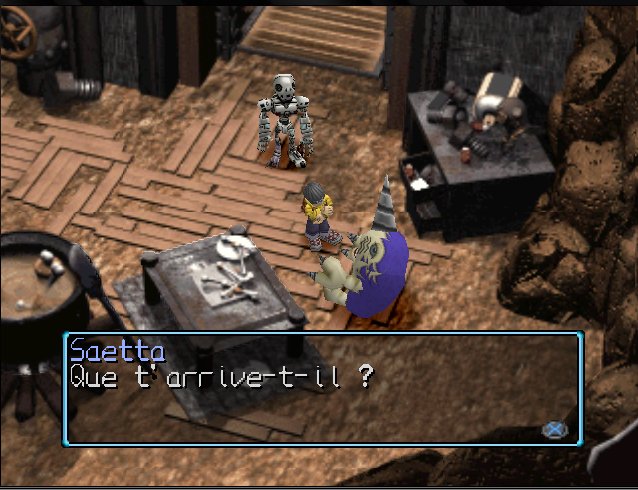 Once you've beaten him, he'll apologize for his behavior and you can continue on your way. Go back to the screen with the 3 Goburimon and take the eastern path. You'll find a Drimogemon digging a tunnel.
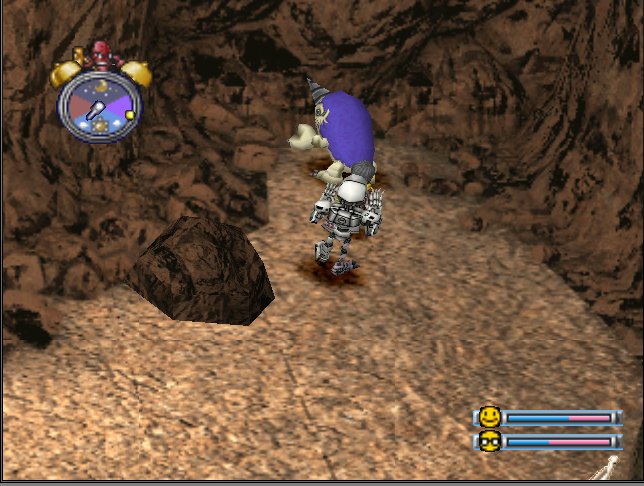 Talk to him and he'll offer to have you haul the rubble out of the mine. Do it — it's required to progress in the game and the rewards are great: 500 Bits per trip, and your Digimon gains 5 Offense points and 5 Defense points. When you've made at least 10 trips, he'll thank you. Leave the Excavation for now, then come back to see this same Drimogemon one or two days later. He'll have opened a new passage, unfortunately blocked by a large boulder. Talk to Drimogemon so your Digimon can move the boulder and open the passage leading to the "Lava Cave." Once inside, take the northeastern path to reach a large promontory where Meramon stands at the end. You'll have to fight him. Watch out — he's no pushover, not by a long shot. Once you've beaten him, he'll join the city to help you on your quest. He'll take a spot in the city Restaurant, and will offer the following dishes between 12:00 and 18:00:
see Shop Guide.
Talk to him and he'll offer to have you haul the rubble out of the mine. Do it — it's required to progress in the game and the rewards are great: 500 Bits per trip, and your Digimon gains 5 Offense points and 5 Defense points. When you've made at least 10 trips, he'll thank you. Leave the Excavation for now, then come back to see this same Drimogemon one or two days later. He'll have opened a new passage, unfortunately blocked by a large boulder. Talk to Drimogemon so your Digimon can move the boulder and open the passage leading to the "Lava Cave." Once inside, take the northeastern path to reach a large promontory where Meramon stands at the end. You'll have to fight him. Watch out — he's no pushover, not by a long shot. Once you've beaten him, he'll join the city to help you on your quest. He'll take a spot in the city Restaurant, and will offer the following dishes between 12:00 and 18:00:
see Shop Guide.
- Drimogemon
Go back to the entrance of the Lava Cave and head down the southwestern path. Head west to find a Drimogemon digging. Come back to see him three or four days later to discover a passage to the "foot of Mount Panorama." Talk to Drimogemon and he'll join the city. Now that this passage is open, you don't need to cross the entire Excavation to exit at the "foot of Mount Panorama" — just choose "Cross the tunnel" when you enter. Drimogemon will open a shop, the Treasure Trove, above the farm. The longer he goes out treasure hunting, the better your chances he'll bring back a rare item: see Treasure Hunt Guide.
Mount Panorama
After recruiting Meramon, go back to the screen with the digital signpost on the ground in the Native Forest. You'll notice that the rockslide to the northwest of that screen is gone. You can now head to Mount Panorama through this new passage. This area has plenty of basic Digimon that don't give much, but they're easy to beat.
Recruiting
- Unimon
When you arrive on the first screen, head north to reach the next screen. There, you'll find Unimon injured (only if you already have Centarumon in your city). Give him one of your bandages and he'll join the city. He'll build an Item Shop in place of the Stall. You'll be able to buy the following there:
see Shop Guide.
- Vademon
From where you found Unimon, take the northeastern path. There, you'll find a large plain with crop circles on the ground. It's Vademon, the alien Digimon, who made them — but you can't fight him yet. When you've recruited Shellmon in the Great Canyon, go back to the city and read his news bulletin, the one about UFOs. Head back to the crop circles to find new ones, but still no Vademon. Once you've recruited Skullgreymon, read Shellmon's bulletin again to find new UFO news. Head back to the crop circle spot to finally find Vademon. Talk to him and he'll join the city, where he'll take a place in the Restaurant and sell you the following dishes:
see Shop Guide.
- Mamemon
Take the northern path on the screen with the crop circles Vademon made. You'll reach a screen with some Mudfrigimon. Walk back and forth between this screen and the previous one until the Mudfrigimon disappear. Then explore the screen to find Mamemon wandering around. Go talk to him to start the fight. Warning — Mamemon is an Ultimate Digimon, so this will be a very tough fight! Once you've beaten him, he'll join your city and open the Antique Shop inside the Item Shop. When you enter the Item Shop, go right to find a staircase — go down to reach the Antique Shop. Mamemon will sell you the following items: see Shop Guide.
Gear Savanna
When you've recruited Drimogemon into your city, you can cross the Excavation to reach the area called foot of Mount Panorama. From there, you can go to Mount Panorama by taking the northeastern path. The northwestern path will take you to the Gear Savanna. This area has quite a few Champion-level Digimon that can give you a hard time.
Recruiting
- Leomon
When you enter the area, take the eastern path. Then take the northeastern path on the next screen and, when you reach the third screen, continue a little north. You'll see a Patamon being chased by a Goburimon. After some dialogue, you'll see Leomon appear and drive the Goburimon away. Leomon will run off right after, followed by Patamon. Follow them to reach a small training area where Leomon is. Talk to him and he'll tell you he needs the Stone Tablet of his ancestors to know what to decide about the future of Digimon. You'll find this Stone Tablet in the Excavation when your city's prosperity has passed 45. Enter the Excavation and go back to the room with the 3 Goburimon, then take the southern path. Follow the tunnel to reach a small room at the end. Talk to the Drimogemon there, then go get the tablet from between the paws of the lion statue to the west. Go back to Leomon and give him the tablet — he'll then join you. He'll help Birdramon with his Birdramony agency and provide you with valuable information.
- Patamon
Take the northern path from where you saw Leomon rescue Patamon. You'll reach a screen with a restroom. Then take the western path to reach the screen where Patamon is. Fight him three times in a row, winning each time, for him to agree to join the city. He'll join the Item Shop team and you'll be able to buy:
see Shop Guide.
- Elecmon
Take the western path from where you fought Patamon.
On the next screen, you'll find a red and blue Digimon. As soon as you approach him, he'll electrocute you. Restore a bit of HP to your Digimon and touch Elecmon again. You'll lose a few more HP. Touch him one last time and he'll join the city. He'll provide electricity — which looks great at night.
- Biyomon
Go back to the screen where you fought Patamon and head south. There, you'll arrive at a screen with a small pink bird. That's Biyomon, who will flee when you arrive. Follow him and he'll flee a second time. This time, go the opposite way to trigger a short dialogue where you can choose "Wait" or "Leave." Choose "Wait" and you'll send your Digimon to drive Biyomon toward you. Be careful — it doesn't always work! Change your position if it fails. Once you've caught him, he'll join the city. Biyomon will join the Item Shop team. It doesn't change what's available for sale, but there will now be cards on the machine to the left of the counter. Cards cost 100 Bits and are random.
If Biyomon serves you, you'll also be able to buy: see Shop Guide.
Trash Mountain
The entrance to this area is right next to the restrooms in the Gear Savanna. The enemies here are tough, but it's worth it — they drop a decent amount of Bits.
Recruiting
- Sukamon
When you enter the area, rush north to reach the screen where the Sukamon King is. Right to the west as soon as you enter the area, you'll find an old fishing rod. Pick it up — it'll let you fish in Dragon Eye Lake. Now talk FIRST to the Sukamon standing to the left of the blue sign, a little further north. He'll offer to drop by the city from time to time, but he'll never really join it. Talk to the Sukamon King: he'll be able to turn a Digimon that has transformed into Sukamon back to normal.
Dragon Eye Lake
There are two entrances to this area. One is on the screen with the Native Forest restroom (take the path going west), and the other is on the screen where you recruited Palmon — the southwestern path near the Goburimon. If you take the entrance near the restroom, you'll arrive at the northern beach of Dragon Eye Lake. You can fish there.
Geko Swamp
You can enter this area by taking the northeastern path at the Gear Savanna restroom screen. The Digimon here aren't very tough and don't give much in Bits.
Recruiting
- Gekomon
Once on the first screen of this area, take the northwestern path to reach the second screen. There, walk back and forth between the two screens until Otamamon (a sort of blue tadpole) appears on the second screen. Beat him and some Gekomon will take you to ShogunGekomon, their chief. After some dialogue, he'll cast a spell that lets you pass through the mist in the Misty Trees. ShogunGekomon will also trade your duplicate cards for points. Here is the list of items you can get based on your total points: see Shop Guide.
Just before leaving ShogunGekomon's home, talk to the Gekomon in the bottom-left corner. He'll join the city if Greymon has already built his Arena there. Otherwise, come back to see him once it's done.
Misty Trees
Go back to the screen where you found Otamamon and take the northeastern path to enter the Misty Trees. There, you'll find some big Digimon that can give you a lot of trouble, but they drop a decent amount of Bits.
Recruiting
- Gabumon
When you enter the area from the Geko Swamp, take the northwestern passage. You'll reach a screen with a large cliff at the end. To the west of that cliff, you'll see a Digimon half-hidden by the rocks. Talk to him to fight him. Once beaten, he'll join the city. He'll help Drimogemon in the Treasure Trove — though I haven't figured out what exactly that changes!
- Kokatorimon
When you enter the area from the Geko Swamp, take the northeastern passage. Then take the northern passage and continue north on the next screen to reach the screen where Cherrymon is. You'll find Cherrymon in the northwest of that screen. Talk to him and he'll make a large part of the fog disappear. Once you're done talking with Cherrymon, take the northeastern path. On this new screen, take the southwestern passage to reach a screen with a cave to the north. Come back near this cave before sunrise to find Kokatorimon. Talk to him to fight him. Once beaten, he'll join the city and make you a wonderful statue next to the restrooms.
Toy Town
The entrance to this area is behind Cherrymon in the Misty Trees. You'll find tough Digimon there that drop a decent amount of Bits.
Recruiting
- Monzaemon
When you enter the town, go into the first house on the left. You can't miss it — it's a large plushie shaped like a purple Tyrannomon. Inside, you'll find a Monzaemon costume. Come back to examine the costume when you have a Numemon with you. It'll slip into the costume and digivolve into Monzaemon. Now leave the house and head northeast to reach a large house shaped like a robot head. Some robots will ask you to rescue their friend, who was kidnapped by Warumonzaemon. They'll open the entrance to the manor a little further north. In the manor, climb three floors guarded by ToyAgumon and Tankmon. On each floor you'll have to choose between three doors. Two of them are trapped and your Digimon will lose some HP. Only the third will lead you to the next floor. Unfortunately, the trap locations change every time you enter the room. Once you've cleared all three floors, choose between two gifts. Choose the small gift to make Warumonzaemon appear — you'll have to fight him. Once you've beaten him, he gives you a gear. Go back to the robot house and see the big robot at the top of the room. After a series of dialogues, the Monzaemon Plushie will join the city.
Overdell
Go back to the beach where you dropped off Coelamon in the Tropical Jungle area and take the northern path. Continue north on the next screen to reach Overdell. The enemies in this area aren't very powerful but they give you some Bits — always a good thing.
Recruiting
- Bakemon
When you enter Overdell, head north to find two Darkrizamon near a large arch. Pass between them to enter the Overdell cemetery. Explore the screen to find a ghost wandering around on its own. Talk to it and answer Yes, Yes, and then No to the questions it asks. It'll then join the city, where it will float near the Item Shop.
- Skullgreymon
Enter the house located to the north of the Overdell Cimetary. Warning — only Virus-type Digimon can enter! Once inside, you'll find yourself at the foot of a monumental staircase. Go to the right of the staircase to find a small door at the end. Go through it to reach the restrooms, then go through the door at the top left. You're now in the kitchen. Go through the door on the other side to reach a room with two PCs. Go through the door just below to enter the dining room. Examine the fireplace to get the Manor Key. Open one of the doors on the side of the room to get back near the staircase. Go back to the restroom room and go through the door on the right. Climb the staircase you'll find there to reach the attic. Head to the bottom right of the attic to reach a sort of grate. Keep walking on it to pass through and drop down to the floor below. You're now in a sort of study — go through the door on the right to reach a bedroom. Examine the bed to open the secret passage leading to the manor's crypt. You'll find Myotismon lying on the floor — talk to him and he'll give you the Refrigerator Key. Go back to the kitchen and open the refrigerator to find a small note. Leave the manor to find an UltraMeat in front of the entrance. Give it to Myotismon in the crypt and you'll get a short conversation with him in the dining room. Go back to the city and read Shellmon's bulletin about Myotismon once you've recruited him. Return to the manor and check the dining room and crypt — you won't find anyone. Head toward the manor entrance to see Devimon appear. After some dialogue, go through the door at the bottom right of the room to enter a room with an elevator. Use it to go down to the manor's basement. Head north in this room to find two doors: one guarded by a Tekkamon and the other by three Darkrizamon. Fight the Tekkamon — he guards the real door. Go through it and you'll find Myotismon locked in a cage. Continue northeast to reach a new room where you'll find SkullGreymon. Talk to him to fight him. Warning — he's an Ultimate Digimon, so the fight will be very tough. Once you've beaten him, go back to Myotismon in the cage to free him. Go back to the dining room to have one last conversation with Myotismon before leaving the manor for good. You automatically recruit SkullGreymon when you free Myotismon, even without the recruitment music and message. Nobody quite knows what SkullGreymon does in the city since you never see him, but he's there — just ask Jijimon!
Great Canyon
Go back to the beach where you dropped off Coelamon in the Tropical Jungle area and take the northern path. Continue north on the next screen to reach a new screen. Head northeast to find an invisible bridge that will take you to the Great Canyon. The enemies here aren't too powerful but they give you a few Bits — can't complain!
Recruiting
- Monochromon
As soon as you arrive in the area, you'll find a shop a little to the east. Go in and talk to Monochromon, who runs it. He'll offer to let you fill in for him. It's a test, and if you manage to make a profit of more than 3072 Bits, he'll join the city. He'll join the Item Shop team and you'll be able to buy:
see Shop Guide.
- Birdramon
Take the eastern path from Monochromon's shop, then on the next screen take the northwestern path. All the way to the north you'll find a sign warning of danger. Advance a little further north and, after some dialogue, head back south. Head north again a few seconds later and you'll tumble to the bottom of the Great Canyon. Once you've recovered from the fall, take the northwestern path to reach the elevator. Examine it once to remove a stone blocking it, then a second time to go to the top of the Great Canyon. Once at the top, head west to reach a sort of nest. After some dialogue, Birdramon will attack you. Once you've beaten her, she'll join the city and fly you back there at the same time. Birdramon will open a travel agency that lets you move quickly from the city to distant areas. Keep in mind you must have already explored those areas on foot before you can use Birdramon's service. One more important thing: you return to the city under your own power. Here is the list of available destinations:
see Shop Guide.
- Shellmon
After entering the Great Canyon for the first time, go back to the city and talk to Yuramon. He'll tell you there are rumors about bandits in the Great Canyon. Now head near Monochromon's shop in the Great Canyon and take the eastern path. On the new screen you'll reach, you'll find two paths — take the one heading northeast. After some dialogue, advance a little further north and Ogremon and his team of Agumon will attack you. The fight won't be easy, but with a well-trained Digimon you should manage. Once Ogremon and his crew have fled, head north to find an elevator. Use it to descend to the bottom of the Great Canyon. Once at the bottom, quickly take the southwestern path to reach the entrance to Ogremon's Ogre Fortress. There's an Agumon guarding the entrance, but he'll flee as soon as you talk to him. Enter the Ogre Fortress: you'll mainly find Agumon and Gabumon inside. Take the northern path to reach a new room. The northern path behind the iron curtain leads to the vault room, which won't open until you've beaten Ogremon inside the fortress. Take the eastern path to enter the next room. There, you'll find three Agumon guarding a door. Beat them to pass through. This is the last room of the fortress: Ogremon's bedroom. You'll find Ogremon with a few henchmen a little further north. Beat him and he'll flee through a secret elevator in the room. Follow him to reach the other side of the Great Canyon. Take the eastern path to reach a new screen. Head north to fight a small Goburimon. Once you've beaten it, continue north. You'll then hear someone calling for help. Go back into the Ogre Fortress through the secret elevator, then exit at the bottom of the Great Canyon and take the elevator there. Use it to go up and take the northwestern path. There, you'll enter the Freezeland area. Immediately take the southwestern path to come back to the other side of the Great Canyon and meet Shellmon, who'll thank you by joining the city. He'll run the news bulletin board below the Restaurant. There's a lot of interesting things to read there.
Freezeland
You have two ways to enter this area. The first is to go back to see Cherrymon in the Misty Trees, head to the screen east of Cherrymon, and take the path all the way to the east. The second is to go near the Great Canyon elevator (the one leading to Birdramon's nest) and take the northwestern path. The enemies here aren't very powerful but they give you a few Bits.
Recruiting
- Frigimon
First, read Shellmon's bulletin about a Legendary Digimon in Freezeland. Now bring a sick Digimon or one that's vulnerable to the cold — one from the following list — and wait for it to fall ill: Agumon, Greymon, Tyrannomon, Meramon, Monochromon, Kunemon, Kuwagamon, Kabuterimon, all Baby Digimon, all In-Training Digimon. Wait between half a day and a full day for it to get sick. The best place to wait is right next to the area's restroom, located two screens north of the area entrance from the Great Canyon. Once your Digimon is sick, wait a little longer and, just before your Digimon loses a life from the illness, Frigimon will come to save you and heal your Digimon in his Igloo. After a short conversation, you can take your leave. Come back to see him when your Digimon has evolved (to Champion for Babies and In-Training Digimon) and, after some dialogue, he'll join the city. He'll take a place in the Restaurant and offer the following dishes from 18:00 to 24:00. see Shop Guide
- Garurumon
Go back near Frigimon's igloo and take the southwestern path. There, you'll find Garurumon. Talk to him to fight him. When you've beaten him, he asks for a rematch the next day around 16:00. Accept and go see him the next day. Beat him again and he'll join the city. He'll take a place in the Restaurant and offer the following dishes from 0:00 to 6:00. see Shop Guide
- Penguinmon
Head to the area's restroom and take the northeastern path, then the eastern path. Now take the southeastern path to reach a sort of ice sheet. Take the northeastern path to reach a sort of frozen beach with a cave. In front of the cave, you'll find Penguinmon. Talk to him and he'll challenge you to Curling. Listen to his explanation of the game and get started. If you lose, go fish in Dragon Eye Lake and give Penguinmon a fish to challenge him again. If you beat him, he'll join the city and open a Curling rink in Greymon's Arena. You'll then be able to challenge Penguinmon to Curling to win prizes. You'll need to give him a fish to start a game, of course. Here is the list of prizes — note that they are awarded randomly when you win: see Shop Guide
- Mojyamon
Go back to the Freezeland ice sheet near Penguinmon's cave and take the southeastern path. You'll find a Moyjamon offering trades. Go to the previous screen and head south. There, you'll reach another part of Freezeland with two more Moyjamon. The trick here is to trade with these Moyjamon in order to recruit one of them! The last one you trade with will accompany you to the city. You need to trade for each item that each Mojyamon asks for at least once. Here is the list of trades you can make with them.
The Mojyamon alone on the screen to the southeast of Freezeland: DigiMushroom Super Carrot Lucky Mushroom
The Mojyamon, to the southeast of the screen, south of Freezeland: MegaMeat SpeedROM DigiCarp
The Mojyamon, to the south of the screen, south of Freezeland: OmniRAM Medium Healing RAM DigiAnchovy
I recommend you choose carefully which one you want to bring to the city, because you won't be able to trade with him anymore once he's there. The Mojyamon who joins your city will sell the following items in the Antique Shop.
see Shop Guide
- Whamon
Go back near the Freezeland ice sheet, next to Penguinmon's cave, and take the western path to reach a new section of Freezeland. Head a little south to find Whamon waiting there. Talk to him, tell him you'll help him, and he'll take you to the Secret Beach Cave. You'll find Ogremon there with a new partner, Waruseadramon — a tough one. Once you've beaten them both, they flee. Whamon will bring you back to Freezeland and join the city. You'll find Whamon to the right of Jijimon's house, and he'll take you to the following locations.
- Secret Beach Cave. (you can recover the contents of a few PCs you couldn't loot after the battle with Ogremon)
- Factorial Town. (a new area we'll get back to a little later)
- Ogremon
You've beaten him twice now and both times he's fled. As the saying goes: third time's the charm! Fight him a third time and this one will stick! Once you've beaten Ogremon in the Secret Beach Cave, go back to the city and head to the Excavation entrance. There, you'll discover that Ogremon has just set up his new H.Q. inside. One of the merchants at the Gear Savanna market will then ask you for help.
Enter the Excavation and rush straight to the room with the three Goburimon to find Ogremon. Beat him again along with his henchmen and he'll join the city. Ogremon will patrol near Centarumon's Clinic during the day, keeping an eye on any suspicious Digimon that might wander into the city.
Ice Sanctuary
To enter this area, go near the Freezeland restroom and take the northwestern path. Continue north to reach the Ice Sanctuary. Warning — only Vaccine-type Digimon can enter.
Recruiting
- Angemon
Once inside, head northeast to find a statue in front of an ice bench. Examine the statue, then position yourself at the first ice bench on the left. Your Digimon will open a secret passage under the statue. Take this passage and go a little further to find two Ice Gotsumon. Just to the right of these two Digimon, you'll see a slightly darker-colored wall — walk straight into it to find a new passage. In the next room, take the northeastern path to reach a sort of ray of light coming out of the floor: it's a teleporter. Walk onto it to change rooms, where you'll fight some Digimon before reaching a staircase you'll climb. In this new room, head north and then go down the western corridor to reach another teleporter. Use it. Then head south to fight three Digimon. Once they're beaten, continue south to find a glowing blue puddle on the floor. Walk on it for a short dialogue. Once the dialogue is over, use the teleporter further north to go back to the previous room. Rush to the teleporter further west to return to the room with the statue. Go down the staircase under the statue, then immediately go back up to see Angemon appear. He'll join the city after a few lines of dialogue. Angemon will take a place in Jijimon's house, just to his left. He'll give you some useful information about the game.
Factorial Town
Go see Whamon in the city and he'll offer to take you to Factorial Town. There, you'll find powerful Digimon that give a lot of Bits.
Recruiting
- Numemon
When you enter the area, take the northeastern path to enter a new screen. Rush north to enter the central square screen of Factorial Town. To the north of this square, you'll find a passage leading to the sewers. Go down and head southeast to find Numemon. Talk to him, then come back to the central square. Head east to find a computer screen with a door that you'll go through. Talk to Andromon and leave the room. Now continue east to reach a new screen. You'll find two Guardromon on duty. Ask them about the guard change schedule — they'll tell you it's at noon and midnight. Hide inside the computer where Andromon is and wait until noon or midnight plus one minute before rushing out to see the two Guardromon. You'll find they've both left. Don't waste a second — go through the door to the east. There, you'll enter the main factory. Go through the northeastern door to reach another section of the factory where you'll find a Geremon a little to the north, and behind him on the western wall, a door. Open it to find Giromon smashing all the computers in the room. After some dialogue, he'll attack you. Warning — he's an Ultimate Digimon and the fight will be very tough! Once you've beaten him, he's knocked out for a good while. Go back to see Andromon and talk to him.
After some dialogue, go back to the sewers to find Numemon. You'll have to fight him after
some dialogue. Once you've beaten him, he'll join the city. Numemon will sell you the following items in the Antique Shop.
Enemy Repellent 5000 Bits
Enemy Lure 5000 Bits
- Andromon
When you've beaten Giromon, Andromon will want to join you — but not before he repairs the damage Giromon caused. Come back three or four days later to check on the repairs and Andromon will join you. You'll find him near Birdramony de <birdramon where he'll tell you about the history of the Digimon world.
- Giromon
Once Andromon has repaired the damage Giromon caused, go back to see him in the room where you fought him. He'll have come to his senses and will join the city. You'll find him in the Restaurant near a jukebox. He'll let you listen to the game's music.
WARNING: DO NOT TALK TO GIROMON IN THE RESTAURANT, OR YOUR GAME WILL DEFINITELY FREEZE. (I haven't verified this myself — try at your own risk lol!) .
- Nanimon
Once you've recruited Andromon and Giromon, go back to the sewers where you found Numemon. Head a little further north and you'll find Nanimon in a corner. Talk to him and he'll disappear, leaving behind a Dimensional Key Ring that lets you carry 10 extra items. Now go hunt for Nanimon! Head back to where you fought Meteormon in the Speedy Time Zone area, near the Ancient Dino Region, to find a Nanimon. Talk to him and he'll flee. Head to the Excavation and go back to the room where you found Leomon's Stone Tablet. All the way in the bottom-left of the statue, you'll find Nanimon.
Talk to him and he'll flee again. Head to the Ogre Fortress. Go back to Ogremon's bedroom and find Nanimon in the northwest of the room. Talk to him again and he'll take off running to a new destination. Rush to Toy Town and go back to the room where you fought Warumonzaemon to find Nanimon.
Talk to him and, this time, he'll join the city — leaving behind a second Dimensional Key Ring that lets you carry a total of 30 items in your inventory. When you go talk to Jijimon, he'll tell you that Nanimon visited the city but left shortly after.
- MetalMamemon
You'll find him on the screen after the port where Whamon drops you off. You'll know he's there when you notice the area's usual Digimon are gone.
Just walk back and forth between screens until he appears. Warning: MetalMamemon is an Ultimate Digimon and he's far from easy to beat! Once you've beaten him, he'll join your city. He'll take Penguinmon's place if you score a perfect 10 at Curling.
Beetle Land
To reach this area, you first need to buy the Miracle Fishing Rod from ShogunGekomon. Now go to Toy Town to talk to a Tankmon who'll explain that a monster appears near the southern shore of Dragon Eye Lake. It only appears at sunrise and sunset. Head to the southern shore of Dragon Eye Lake and fish for the enormous shadow you'll see at sunrise or sunset. It accepts any type of bait.
If you reel it near the shore, Seadramon will appear. You can ask him three things.
- To be your friend: he'll give you the Blue Flute and let you cross Dragon Eye Lake peacefully toward Beetle Land.
- To learn a technique: he'll teach you the Water Magic technique, but only once.
- To get an item: he'll give you a Water Bottle.
Recruiting
When you arrive on the Beetle Land beach, rush northeast to reach the local "Town."
In the training room on the right. Talk to the Kabuterimon further to the north and he'll join the city. You'll find him in the Training Ground, the screen to the west of the one with Jijimon's house. He'll upgrade your training equipment and you'll gain a few more points per training session.
- Kuwagamon
Go into the training room on the left. Talk to the Kuwagamon further to the north of the room and he'll join the city. You'll find him in the Training Ground, the screen to the west of the one with Jijimon's house. He'll upgrade your training equipment and you'll gain a few more points per training session. Once you've set foot in Beetle Land, you'll be able to return there using the Birdramon Express in the city. On the 22nd of each month, you can take part in the Beetle Land tournament. This tournament is only open to Insect-type Digimon such as Kunemon, Kabuterimon, or Kuwagamon. The winner will receive the Beetle Tear.
Mount Infinity
When the city's prosperity reaches 50 or more, the entrance to Mount Infinity will open. It's located east of the farm above Jijimon's house. You'll need to reach its summit to fight MachineDramon, the most powerful Digimon in the game. The fight will be extremely difficult and lengthy. I strongly recommend stocking up on as many HP- and MP-restoring items as you can — you'll really need them. Once you've beaten him, you'll get to see the game's ending and can save your game. But beware — the game isn't over yet!
Recruiting
- Devimon
You'll find him on the fourth floor of Mount Infinity. He'll attack you as soon as he sees you.
The fight isn't very hard and you should beat him fairly easily. He'll then join the city, and Devimon will sell you the following items in the Antique Shop:
Devi Chip A 5000 Bits
Devi Chip D 5000 Bits
Devi Chip E 5000 Bits
Warning: if you use these Devi Chips on your Digimon, it will lose one day of life per chip used.
- Megadramon
You'll find him on the top floor of Mount Infinity, on a solitary platform a little to the north. You don't have to fight him, but if you want to recruit him, you'll need to. Warning: Megadramon is an Ultimate Digimon and this will be a very tough fight! Once you've beaten him, he'll join the city and you'll find him next to Greymon's Arena. He'll also participate in certain types of tournaments.
- MetalGreymon
Just before fighting the boss of Mount Infinity, you'll have to face MetalGreymon.
It's a very tough fight — he's a very powerful Ultimate Digimon. Once you've beaten him, he'll join the city and open a bar in Greymon's Arena. Every time you talk to him, he'll try to come up with nicknames for your Digimon...
- Digitamamon
Reload the save you recorded when you finished the game and go back to the room where
you fought MachineDramon.
There, you'll find a sort of egg in the middle of the room. Examine it to fight Digitamamon. Warning — he's an Ultimate Digimon and he won't be easy to beat! Once beaten, he'll join the city and take a place in the city Restaurant, where he'll offer the following dishes.
- Boiled Egg 6000 Bits (effects are random)
- Omelet 2500 Bits (effects are random)
- Soft-Boiled Egg 1000 Bits (effects are random)
Back Dimension
Once you've finished the game, load the save you made after the ending to return to the game. Explore the following areas: Ice Sanctuary, Ogre Fortress, and Grey Lord's Mansion to find the Back Dimension. It's randomly located in one of them. You'll know you've found it if, when you enter, it looks like Mount Infinity. Explore the area to reach the boss room at the very end. There, you'll be able to fight Machinedramon again. Warning — he's much more powerful this time than he was in Mount Infinity. When you beat him, he'll digivolve into a basic Digimon and you'll automatically be sent back to Jijimon's house. He'll give you a Melon Chain. From now on, every time you talk to Jijimon on the 25th of each month, you'll be able to return to the Back Dimension to fight Machinedramon again. Unfortunately, this won't give you a new ending for the game — but it helps pass the time while waiting for the next Digimon game.